Here is a step-wise guide on how to make a dunce cap or hat out of paper, poster board or newspaper. CraftCue puts forward some fascinating ideas on how to use various materials, to add a quirky touch to the dunce caps.
Hit the Spot
Fasten a couple of sleigh bells (probably from last Christmas), or a battery-operated LED at the pointed end of the cap for some tinkle and ‘glow-in-the-dark’ experience.
Dunce cap, named after John Duns Scotus in the 14th century, was used as a thinking cap for the slow learners. An urban reference to anyone who makes a silly mistake for which he is made to wear a cap for fun, indicating that he is a fool or dimwit. CraftCue provides you six simple, yet wacky, tips with some humor blended in to make this a one-of-a-kind cap.
Materials Required
◤ A rectangular or square sheet of paper, newspaper, or poster board.
◤ Pencil (for marking).
◤ A pair of compasses, or a piece of thread or yarn.
◤ A pair of scissors.
◤ Scotch-tape or adhesive.
How to Make a Dunce Cap
Step 1
a) Place the rectangular or square sheet of your choice on a flat surface.
b) While using polystyrene and poster boards, ensure that the sheets are flexible enough, as they may crack while folding.
CraftCue tip: You may create decorative sheets by gluing gift wraps over the plain sheet. Go for wraps with dorky images or cute swines all over them. Sheets of metal are not recommended as they may cause injury while handling. Instead, use metal foils to obtain a metallic finish.
Step 2
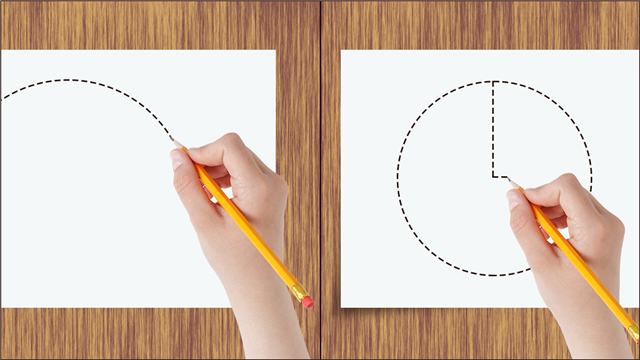
a) If working with a pair of compasses, then place the needle point at the bottom-left corner of the sheet and scribe an arc from the top-left corner towards the bottom-right.
b) Alternatively, tie a piece of thread or yarn to the rear end of the pencil. Place the pencil at the top-left corner of the sheet. Adjust the loose end of the thread or yarn at the bottom-left corner of the sheet and hold it firmly with the thumb such that the thread or yarn is taut. Now, you may mark an arc towards the bottom-right.
CraftCue tip: Inscribe a circle at the center of the sheet, and then mark a sector in it. In this manner, you shall be able to get a cap for the large-headed dolts; however, it will be shorter in height.
Step 3
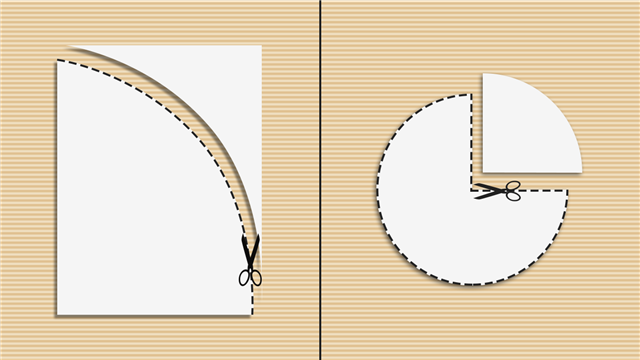
With the help of a scissors or blade, carefully cut along the marked lines.
CraftCue tip: Just in case scissors or blade are not available, then one may try this alternative: Fold the sheet such that the top and bottom edges meet, then again for the left and right edges to meet, and finally fold it for the top and the right edges to meet. Now, place the tip of the formation at the center of a circular based vessel of appropriate radius. Press and tear along the outer edges. Open the folds. Voila! You have a circle.
Step 4
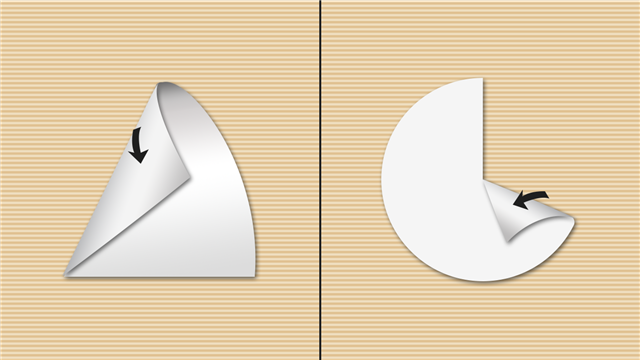
Fold one edge of the sheet inward to meet the other edge such that a cone is formed.
CraftCue tip: Opt for ready-made cones made from cheese blocks, ice cream wafers, paper buckets, or miniature models of traffic cones if available.
Step 5
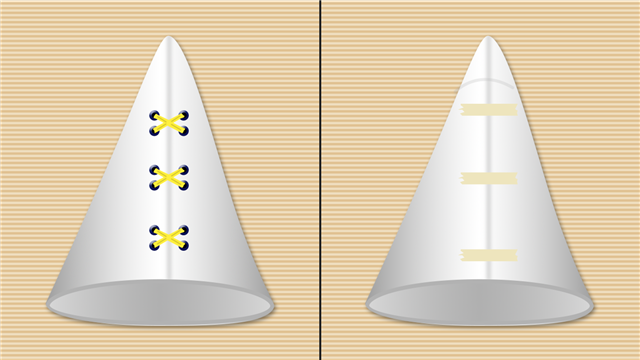
Secure the two edges together with pieces of scotch tape as shown. In case you have a circle with the sector cut out, the overlapping edges can be glued together.
CraftCue tip : Colorful shoelaces and ribbons may come handy to bind the edges. They can be knitted in a decorative fashion through the holes punched along the edges.
Step 6
Mark the alphabet ‘D’ over on the front face of the cap using a marker.
CraftCue tip: One may use UV pen, paint, or marker for the ‘D’ so that it glows in the dark.
While opting for alternatives to the paper cone, decorate the cap accordingly. For instance, the cheese cone caps can have olives at the tip; the ice cream wafer may have colored cotton at the inside bottom of the cap, resembling the cream in an ice cream cone. You may want to avoid using cheese cones in warm surroundings unless you want your head to look like a pizza. All of this for some merry moments with your amigos.
