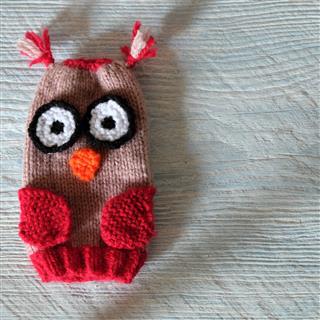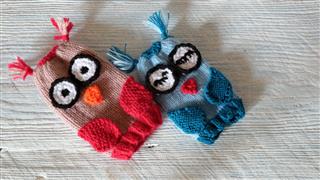
Puppets are a craze amongst kids as well as adults. Making different types of puppets at home is quite easy. Here are some simple and easy DIY ideas for making puppets at home.
Did You Know?
Puppetry has been known to man since thousand of years. It is believed that the first ever puppets were made in India in ancient times. China, Egypt, and Greece also have a rich ancient tradition of puppetry.
Puppets have been very popular since a long time. They are models of human figures, animals, or even inanimate objects. The different types of puppets include finger puppets, glove puppets (sock puppets), kitchen puppets, and string puppets (marionettes). The arm or life-size puppets are usually seen in puppet shows or carnivals. However, the smaller ones can be easily made at home.
Puppet making can be a fun family activity to do with your kids. Here are step-by-step instructions for making four types of puppet. All you need is paper, cardboard, glue, paint (preferably fabric paint), scissors, needle, thread. Cloth, wool, felt, buttons, etc., for decoration.
Finger puppets
As the name suggests, these are very small and fit into your fingers. They do not have any moving parts or strings. You can either use a paper or a cloth to make finger puppets.

1. Firstly, roll a piece of sheet into a cylindrical or tube shape and paste it.

2. On another paper, draw a face and facial features. You can also use ready-made faces of your favorite cartoons.

3. Paste the face on top of the cylindrical tube. Make sure you use less glue to avoid messing your artwork.

4. Your basic finger puppet is ready. Now try making another one with hands and legs, or using a cloth.
Glove puppets
These are also known as sock puppets, and can be made of socks or gloves. Here we will see the one made of a sock.

1. Put the sock in your hand and make a slit in the area between your thumb and forefinger.

2. Take an oval-shaped thick paper, fold it in half, and sew it in the area where you had made the slit. This will make the mouth of the puppet. Now you can see that your puppet can talk.

3. You can paint eyes or even sew buttons as eyes for your puppet. You can add other features like nose, ears, hat, mustaches, etc. Use some colored wool to make hair for your puppet.

4. Your glove puppet is ready. You can put old socks to good use by making these puppets.
Alternatively,
- Get patterns of the animal/bird of which you wish to make a puppet. Trace that pattern on a cloth twice.
- Sew the two cloth patterns together on 3 sides. Do not forget to keep it open at the bottom. The curves should be clipped to prevent the cloth from puckering.
- Turn the cloth inside out so that the stitches are not visible. Paint or sew eyes, beak, feathers, ears of the respective animal/bird which you have chosen. There, you have your puppet ready!
Spoon puppets
They are called so because we use spoons, forkss, etc., as the base for these puppets. They are similar to finger puppets.

1. Use a spoon as a base for your puppet. Trace face, body, arms, and legs of your favorite character on a cardboard.

2. Paint eyes, nose, mouth, etc. You can use fur or cotton as hair for your puppet.

3. You can either paint clothes directly on the cardboard, or use cloth or felt to make clothes for the puppet.

4. Now paste the figure on the spoon using glue. And your easy-to-make kitchen puppet is here!
String puppets
These are also known as marionettes. Their movements can be manipulated with the help of strings attached to their joints. Human movements can be achieved up to some extent with these puppets as all their body parts are movable.

1. Trace the figure (human or animal of your choice) on a cardboard. Cut it precisely in parts.

2. Draw facial features and decorate the figure according to your choice. You can use cloth, ribbons, wool, etc., for the purpose.

3. Make holes at joints to attach strings. Tie strings to the parts that you wish to make movable and nail all these strings together on a wooden rod.

4. And, your marionette is ready. Try moving its hands and legs with the strings.
Alternatively,
- Use the idea of making a glove puppet.
- As a next step, stuff it with pillow stuffing or rags. Sew the open ends.
- Tie threads or rubber bands at the bottoms of legs and arms. As these are made of cloth, sew the parts together and your puppets will move easily.
- Attach strings and nail them together on a wooden rod.
Life-size puppets are fairly complicated to make. Once you master these basic ideas, you can try the bigger marionettes with the help of do-it-yourself kits.


